1.3 打包插件
本地开发并测试插件正常工作后,还需要打包分发给其他用户使用。要打包插件需要先安装 vsce 命令(Visual Studio Code Extensions首字母缩写):
npm install -g @vscode/vsce
然后切换到插件目录对应的命令行环境,输入vsce package命令进行打包:
$ vsce package
ERROR  It seems the README.md still contains template text. Make sure to edit the README.md file before you package or publish your extension.
第一次执行可能会提示README.md文件是模板内容需要更新,可以先删除生成的内容简单处理。更新README文件后重新执行打包命令:
$ vsce package
 WARNING  A 'repository' field is missing from the 'package.json' manifest file.
Do you want to continue? [y/N] y
 WARNING  LICENSE, LICENSE.md, or LICENSE.txt not found
Do you want to continue? [y/N] y
 DONE  Packaged: /Users/chai/vscode-extdev-book/examples/helloworld/helloworld-0.0.1.vsix (6 files, 2.6KB)
打包过程中还会检查仓库地址、版权文件等内容是否合规,这是是一个正规的插件发布到插件市场必须要提供的信息。为了简化流程这里先忽略这些警告信息。最终会生成打包后的 helloworld-0.0.1.vsix 插件文件。
vsix 是标准的 zip 压缩格式,其中打包的文件对应如下目录结构:
├── [Content_Types].xml
├── extension
│   ├── CHANGELOG.md
│   ├── README.md
│   ├── extension.js
│   └── package.json
└── extension.vsixmanifest
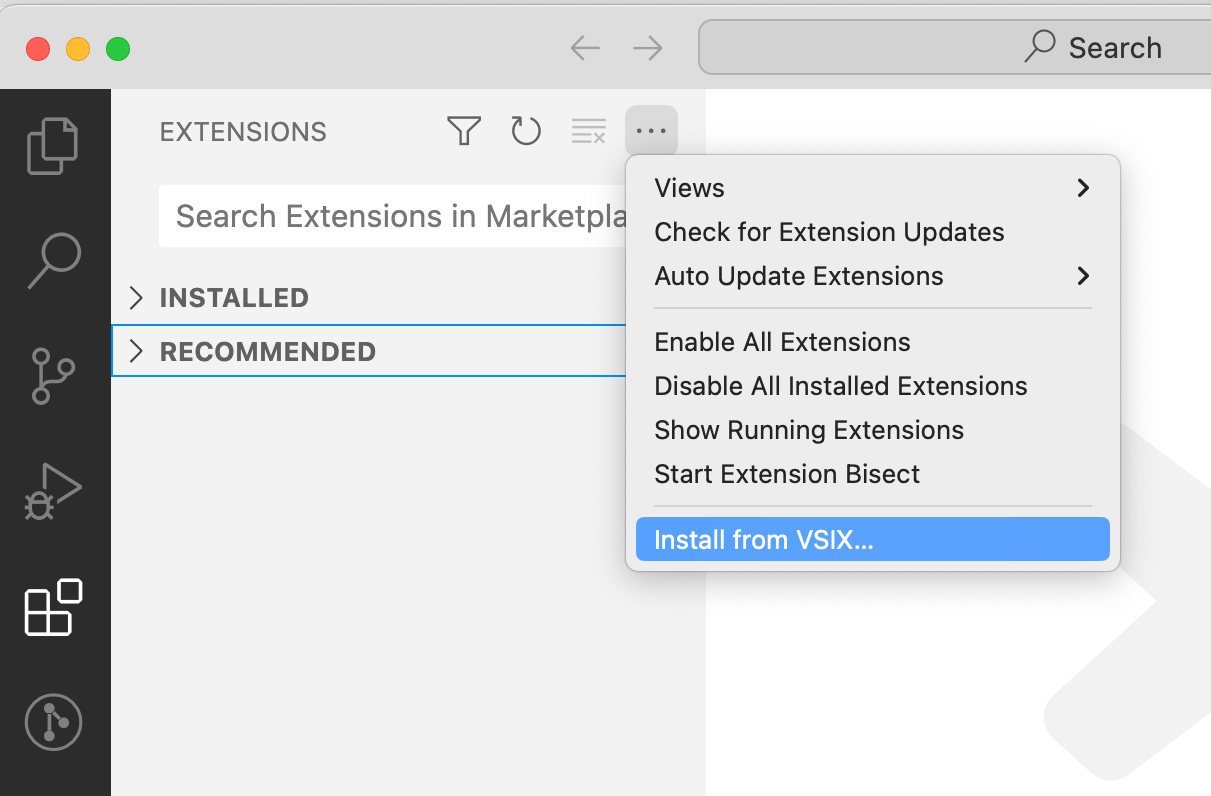
然后打开一个新的VS Code程序,在插件视图点击“Views and More Actions...”按钮,选择“Install from VSIX...”菜单:
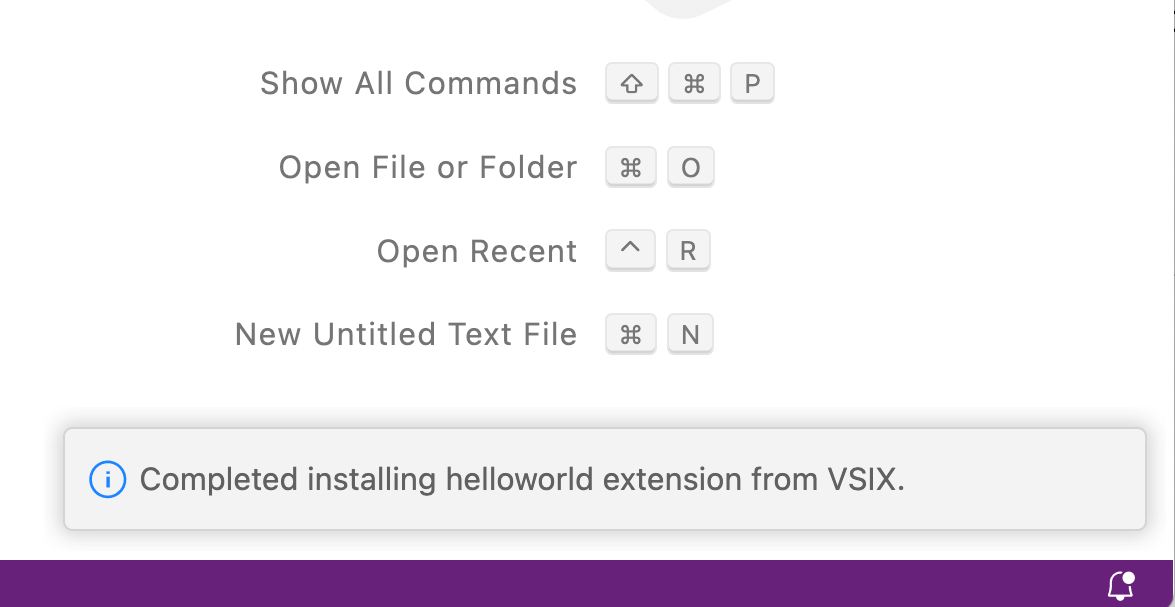
安装成功后会弹出提示安装成功:
macOS和Linux 系统下安装的插件在 ${HOME}/.vscode/extensions 目录,Windows 则是 %USERPROFILE%\.vscode\extensions 目录,插件的产生的子命令名为 undefined_publisher.helloworld-0.0.1(没有指定publisher,所以用了默认的undefined_publisher)。
下面是插件安装之后的目录结构:
$ tree -a ${HOME}/.vscode/extensions/undefined_publisher.helloworld-0.0.1
├── .vsixmanifest
├── CHANGELOG.md
├── README.md
├── extension.js
└── package.json

0 directories, 5 files
可以发现安装后插件目录有一个.vsixmanifest包含插件的一些元信息,其他则是开发插件时的文件。
这样我们通过本地打包和手工方式安装使用开发的插件了。